Wednesday, September 28, 2011

Sunday Cooking Club: Crab Boil

We had a second meeting for our Sunday Cooking Club and this time we decided to say good bye to summer and have a Crab Boil.  This time the menu consisted of garlic cheddar biscuits, seafood chowder, our crab boil and a lemon crunch cake!! 

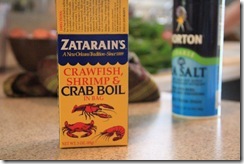
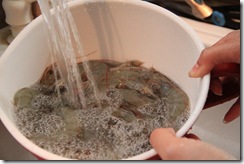
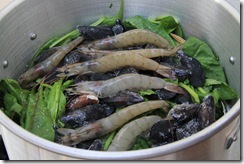
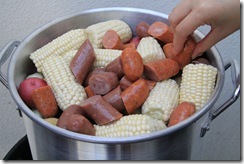
Growing up in Hawaii I had never done a Crab Boil before, so I was super excited!  We got a huge pot and placed it on the grill.  We loaded up the crabs on the bottom, a packet of crab boil seasonings, layered in some garlic, potatoes, onions, shrimp, mussels, corn and sausages.  Yes- we put all that goodness in one pot.  Just watch!   

Food_Kudo5082

054Food_Kudo7

Food_Kudo8116

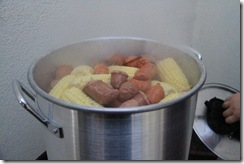
We placed the pot on the grill and let the steaming and boiling go to work!!  We may have been a little overly ambitious and put too much in the pot.  Since we had so much in there we had to have it on for a while, we may have over cooked the mussels and shrimp just a tad…. Despite that everything was super delish!  Here it comes…

Food_Kudo12Pineapple and Cajun sausages and fresh crisp summer corn!  I love fresh summer corn it was the perfect side to the crab.  The sausages were really tasty too I liked the spicy Cajun but some of the other girls loved the sweetness of the pineapple. 

Food_Kudo13 Our slightly overcooked shrimp and mussels (sorry little ones) next time we’ll give you more TLC. 

Food_Kudo18

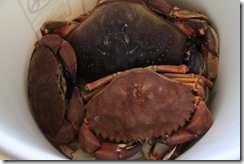
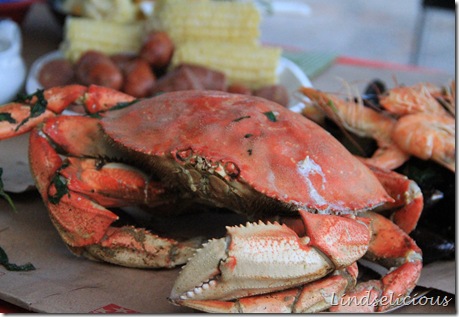
And our main star, the crab!  We did two kinds of crab Dungeness and Stone crab!  So good with a little dip of butter and a squeeze of lemon.  

Food_Kudo10

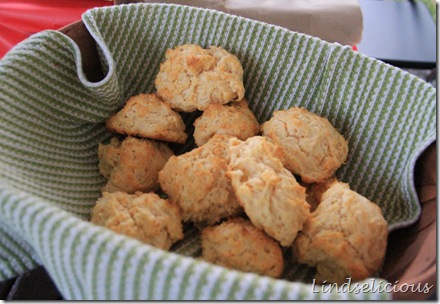
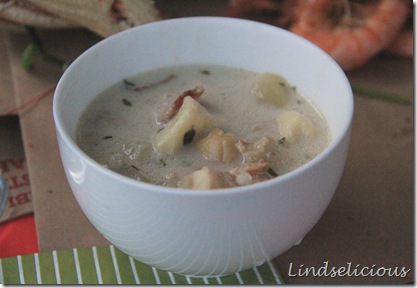
Oh and of course we had garlic and cheese biscuits to go with everything.  And some seafood chowder (which I will be sharing the recipe for later). 

Food_Kudo6

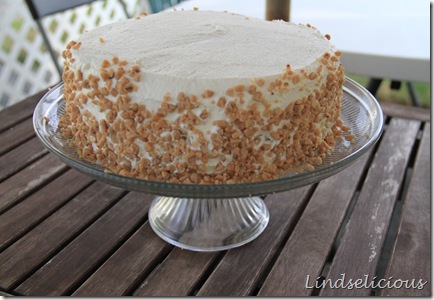
And you cant have a cooking club/girls night without an amazing dessert.  A little bit Southern by way of Hawaii- Lemon Crunch Cake!!   

Food_Kudo3

Our club thrives on, next month we taking a break from cooking and we are going to go Apple Picking!!!  I have been trying to get this arranged for two years, finally everyone is free, there are no USC Football games and we have selected a date.  Now just to find the perfect farms to check out. 

Monday, September 26, 2011

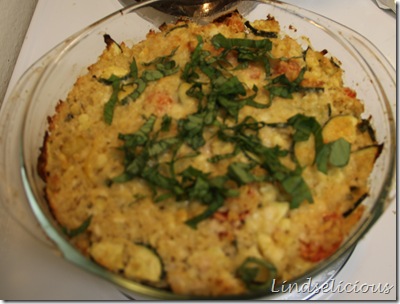
Zucchini Quinoa Corn Casserole

We all know it’s happening, there is a sadness yet excitement about it…  The days of summer, the scent of the beach, along with the fresh fruit and wonderful veggies are all slowly coming to an end.  In it’s place we welcome Football, colder nights, pumpkin spice lattes and the changing of the leaves.  This dish is the perfect transition from summer to fall, it uses the last of the fresh summer veggies all put into a warm comfy and cozy casserole.  The best thing?  This casserole is delicious and good for you!  It’s packed with veggies and protein from some hearty quinoa. 

118

Zucchini Quinoa Corn Casserole
adapted from eat love drink

1 medium zucchini, thinly sliced and quartered
2 cups cooked quinoa
1 cup mini heirloom tomatoes, sliced
1 cobb corn, cut from cobb
1/2 red onion, diced
1 Jalapeno, seeded and diced
1 stalk green onion, sliced
2 eggs
1 tsp. sea salt
1 tsp. pepper
2 cloves garlic, minced
2 tsp. Dijon mustard
1 cup cottage cheese
2/3 – 1 cup grated Parmesan cheese (any hard cheese will do)

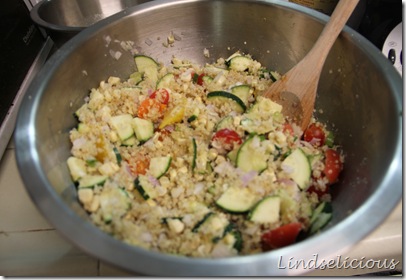
1.  Pre heat oven to 350 degrees.  In a bowl mix together eggs, garlic, Dijon, salt and pepper.  Stir in cottage cheese and half of the cheese.  In a second larger bowl mix together the quinoa, zucchini, tomatoes, onion, jalapeno, green onion and corn. 

115

2.  Mix together the dry and wet ingredients so that the quinoa mix is completely covered with the egg mixture.  Spray a casserole dish with baking spray and transfer the ingredients to the dish.  Top the casserole with the remaining cheese.   

3.  Cover with foil and bake for 20 minutes.  Remove foil and bake for another 40 minutes until top is browned. 

4.  Remove from oven and let cool for 15 minutes.  Top with thinly sliced basil. 

 117

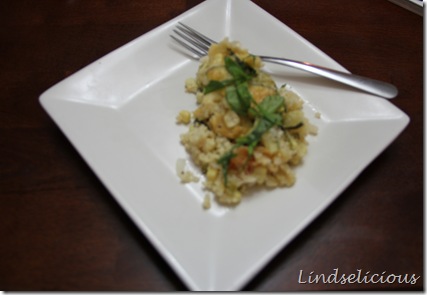
This is seriously delish, I couldn’t believe all the cheesiness that was packed into this dish.  The quinoa was super yummy in here and absorbed all the yummy flavors.  I will definitely be making this again!  You could easily substitute any combination of veggies in here to match what is in season. 

Tuesday, September 20, 2011

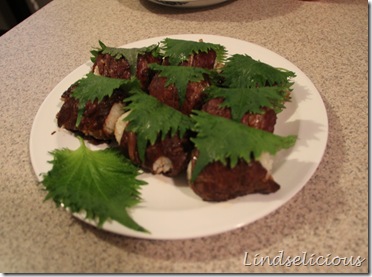
Meat Wrapped Onigiri

When my friends and I got together for our “Cooking Club”, we made Buta no Kakuni and Korean Sushi (Kimbap) as well as mandoo.  We felt like we needed something else, and I thought that these onigiri I had seen in the Peko Peko cookbook were perfect.  The Peko Peko cookbook was a charity cookbook put together by a bunch of great bloggers and chefs to go towards the Japan relief efforts.  There are seriously some great recipes in here from traditional to modern spins on Japanese classics. 

099  

Meat Wrapped Onigiri
from PekoPeko cookbook

2 cups sushi rice
1/4 cup toasted sesame seeds
1/2 lb. sukiyaki meat
12 shiso leaves
1/4 cup soy sauce
2 Tbsp. mirin
2 Tbsp. sugar
2 Tbsp. sake
2 tsp. grated ginger juice
2 tsp. sesame seed oil

1.  Cook rice in rice cooker or stove top.  Once rice is cooked, preheat the oven to 350 degrees.  Line a baking sheet with foil.   

2.  Use a mortar and pestle and grind the toasted sesame seeds.  Mix the seeds into the hot cooked rice. 

3.  Using firm pressure, create 12 onigiri.  *If you do not use firm pressure the rice balls will fall apart when you bite into them.  Wet and salt your hands to prevent rice from sticking all over. *

4.  In a microwavable container, mix together the soy sauce, sugar, mirin and sake.  Heat in the microwave for one minute and stir in the ginger juice and sesame seed oil. 

5.  Using half of the mixture marinate the sukiyaki meat for 5 minutes.  Pick up the slices and wipe off the extra marinade.  Wrap two slices of the meat around the onigiri, covering it completely.  Repeat for the remaining rice balls. 

6.  Place the wrapped rice balls on the baking sheet.  Bake on the center rack for 10-12 minutes, brushing the rice balls twice with the remaining marinade.  When the meat is browned, remove from the oven and cover each ball with a shiso leaf. 

These are totally yummy and would be perfect in any bento lunch!  I am definitely going to make these again and next time I might stick an ume in the middle for a nice bit of saltiness.  We ate these all up, there were no left overs in sight! 

On another note, I am totally enjoying my photo class.  I feel like I have learned so much with only two classes so far.  I’m seeing small changes in my photos and all the concepts that I learned so long ago in high school are coming back to me!  Here are two of my favorite photos that I have taken since I’ve started my class.    

074

058

Sunday, September 18, 2011

N/Naka

Here is the first official post for my restaurant review section.  Previously I had shared meals from the places I traveled, but after thinking about it I decided to share what Los Angeles had to offer as well.  The other week I went out to a fancy Japanese dinner near my house.  N/Naka is devoted to picking the freshest in season ingredients and creating a 10 course kaiseki menu.  Kaiseki is a traditional multicourse Japanese dinner which show off a variety of cooking techniques as well as the cooks artistry.  The restaurant itself is a small intimate modern space that probably only seats about 25 people.  It seemed like everyone there was on a “hot date” or celebrating a special occasion. 

We lucked out and got a reservation at the last minute, but if you want to check this place out I highly recommend calling ahead of time!  There are three menus available at n/naka, the Chefs Tasting Menu, the Modern Kaiseki and the Vegetarian Tasting.  We went with the Chef’s Tasting along with the wine pairing.  The Chef’s Tasting is a 10 course meal, the staff is amazing and walks you through each course and how each wine selection complements each dish.  Here were some of my favorites!   

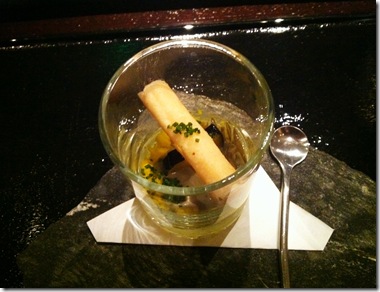
Naka

A spring roll with chives, below it was some eggplant and other goodies nestled in a bed of pumpkin sorbet.  So good, one of my favorite dishes of the entire night!  Can I get 3 more of these please?? 

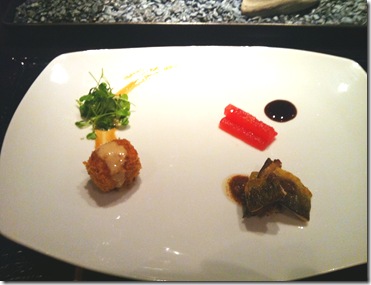
Naka2

We were told that the fish on the right was extremely rare and only in season for 3 months, unfortunately the name skips my mind.  Aji?  But it was paired with watermelon and a balsamic soy reduction and on the left was a delish croquette with micro greens and a ponzu reduction. 

Naka3

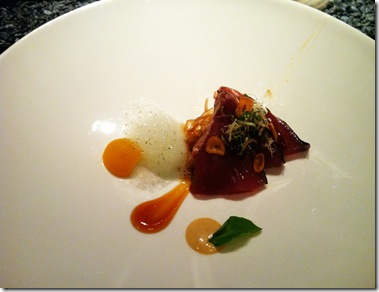
This was like a super high class modern poke/sashimi dish.  It was smoked bonito (I’ve never had it raw or fresh before!!) with garlic chips. Maui onions and balsamic reduction.  This melted in my mouth.  So flavorful!!

Naka6

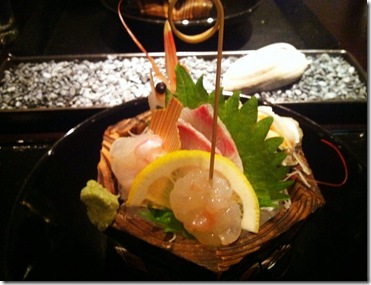
This was the traditional sashimi that countered the one above.  The quality of the fish was so good and it was so fresh, types of fish that I have never tried before were included in there and they all melted like butter in my mouth.  Can you spot the eyeball from the shrimp?? 

Naka4

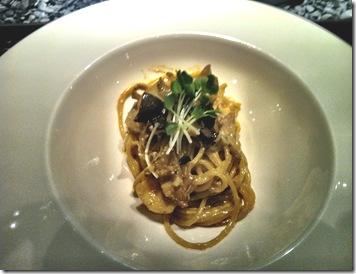
Seriously- this dish was so sexy!!  You might think it’s weird to say that about a pasta- but if you had this you would understand.  Japanese know how to do pasta!!  This was Abalone with a cod roe pasta, with some abalone liver and truffle sauce. 

Naka7

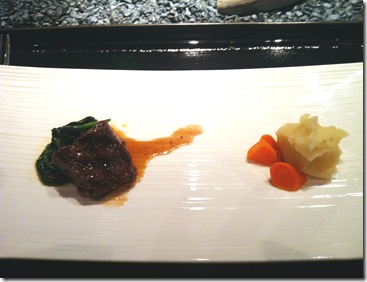
This was our meat course which was a Wagyu beef, the table next to us got the Modern Kaiseki menu and they actually got hot rocks on which they cooked their pieces of meat. 

Naka8

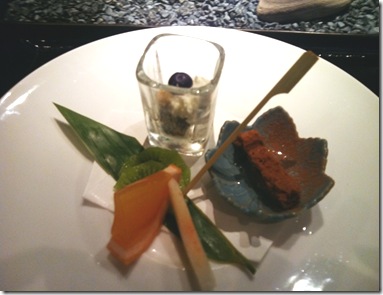
Love love Japanese desserts!  Some fresh fruits, a mochi like cake and a sesame custard with blueberries.  So delicate and refined! 

I love this place, while it is pricey it is definitely a treat to go to and I would love to go back there to celebrate a special occasion.  We had some great white wine and sake pairings as well.  The waiter was hilarious and told us that he was about to serve us the SEXIEST sake we would ever have!  It was true, it was so smooth and went down so nicely.  If you are in Los Angeles, I highly recommend this place!  Go check it out.   

Thursday, September 15, 2011

Caprese Quick Bread

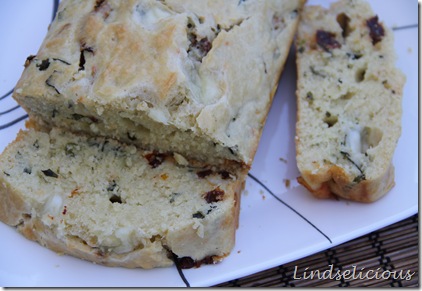
The other weekend I wanted to make bread, but didn’t have the time to be at home for all the kneading, proofing and time for the dough to rise.  So I did a quick search and I stumbled upon this quick bread.  It was perfect!!  I already had all of the ingredients at home so I was ready to get cooking. 

121

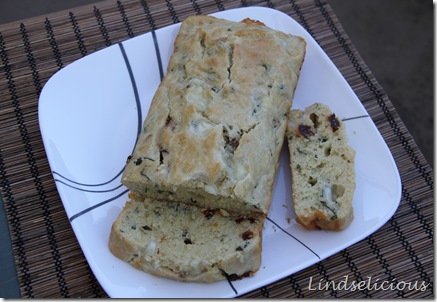
This bread is seriously so yummy, I literally had to text my friend to ask her if it was gluttonous to have 4 slices of bread in one afternoon.  Warm out of the oven with a little pat of butter this bread was a dream.  I literally had to put the bread away and hide it from myself before I ate the whole loaf.  That same friend that I had to text reminded me that I hadn’t posted the recipe for the Caprese bread yet, so here it is! 

Caprese Quick Bread
adapted from Cookin Canuk

2 1/2 cup flour
2 tsp. baking powder
2 eggs
3/4 tsp. salt
3/4 cup non fat milk
2/3 cup olive oil
3/4 cup sun dried tomatoes, cut into small pieces
4 oz. mini mozzarella balls
1/4 cup basil, thinly sliced
1 clove garlic, finely minced

1.  Pre-heat the oven to 350 degrees.  In a bowl combine flour, baking powder and salt.  In a larger bowl whisk together milk, oil, and eggs until well combined. 

2.  Combine the wet and dry mixtures and stir until evenly combined.  Mix in sun dried tomatoes, basil and mozzarella.  *Don’t over mix or the bread can get tough.*

3.  Spray a loaf pan with cooking spray and pour the batter into the pan.  Smooth out the top and bake in the oven for 30-35 minutes.  *Look to see that the bread is a light golden brown and test with a knife to make sure bread is cooked through.*

120

Let the bread cool in the pan for 15 minutes and remove, slice and serve!  This bread is awesome warm right out of the oven or toasted the next day.  I will definitely be making this again, instead of basil I might mix in some pesto instead since I think it would add some added depth of flavor. 

This quick bread is a great base, the possibilities of combinations of add ins are endless!  I totally want to do a green chile, cheddar cheese and maybe bacon. 

Tuesday, September 13, 2011

Kale Cauliflower Salad

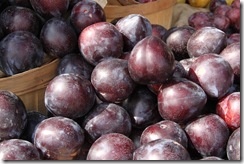
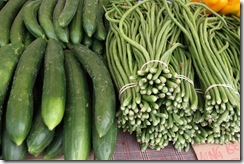
This weekend I went to the farmers market in my hood to pick up some pulots and mini heirloom tomatoes!  I was also there to try and complete my first photography assignment for the class I just started.  The end of summer produce looked great, but I do need more practice changing all my settings.  Here’s a few of my favorite pics!

Green10Purple

Green6Brown5

I’m well into my second month of boot camp and my healthier eating and though the pounds shed are not that high (yet) I can definitely see the results!  The most motivating thing is of course when friends tell you- “you look awesome” or “you lost weight!”.  Once I hear things like that I am even more motivated to eat right!  This is one of those salads that can serve as a meal, with some soup or even a pumpkin cheddar muffin

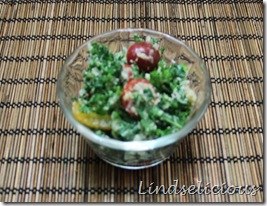
While my outdoor photos seem to be improving, I still struggle taking my food pictures indoors at night.  Hopefully I’ll figure that out soon….

015


Kale Cauliflower Salad
adapted from Heat Oven to 350

1/2 head of cauliflower, grated
1 cup mini heirloom tomatoes, halved
1 stalk green onion, chopped
2-3 cups of kale
1 garlic clove, minced
2 Tbsp. lemon juice
1/2 tsp sea salt
2 Tbsp olive oil
ground pepper
parmesan cheese, grated

1.  Discard the tough stalk of the kale and finely chop the kale leaves. *I used the pre packaged kale from Trader Joe’s!*

2.  In a bowl combine kale, tomatoes, green onions, and grated cauliflower.  In a small bowl combine lemon juice, olive oil, pepper, sea salt and garlic.  Mix well and toss with kale and cauliflower mix. 

3.  Season the salad with pepper and grate some parmesan cheese over the salad. 

011

This salad was yummy and definitely filling.  I took it into work the next day and the kale held up well, but I think the cauliflower let out a stinky smell.  So that’s a warning if you are self conscious or have co workers with sensitive noses.  I am definitely going to start making this to bring to parties cause I think it holds up really well! 

Sunday, September 11, 2011

Sargento Cheese and Pumpkin Cheddar Muffins

Guess what?!  I got to participate in another Tastemaker event through Foodbuzz.  This time it was with Sargento Cheese.  The challenge was to compare Sargento natural cheese with a processed cheese.  I headed to the market and picked up some Sargento Reduced Fat Shredded Cheddar Cheese and their new sliced Natural Provolone Mozzarella along with some classic American cheese slices. 
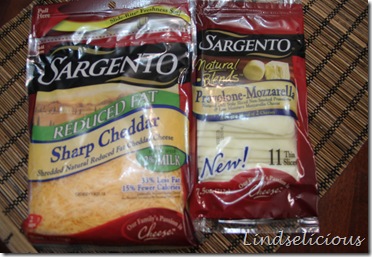
002

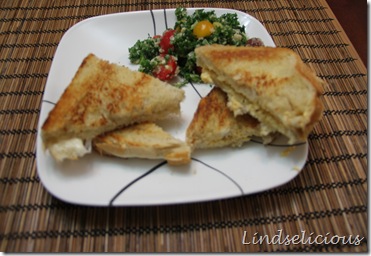
For some reason we all grow up with those American slices, whether or mom made grilled cheese, cheeseburgers or if you had it as part of your afternoon snack.  I am a huge cheese lover, hard, soft, stinky- I love them all!  To do my taste test, I thought what better than a grilled cheese contest.  Both sandwiches were made with freshly baked sourdough bread, buttered, with cheese slices and pepper on the inside.  I grilled them both up on the stove and the bread crunched when I cut them in half.  (You know that’s a good sign).
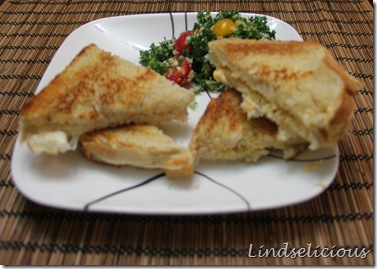
013

That’s the Sargento Provolone Mozzarella on the left (hard to see the cheese since it’s white) and that’s the classic American cheese on the right.  Here’s what I noticed.

American Cheese:  The American cheese seemed to just disappear and absorb into the bread, I might have needed to use another slice of cheese perhaps?  The texture of the American sandwich was also a little mushier, I think a thinner slice of bread might have worked better- the softness and freshness of my sourdough may have absorbed all the cheese? 

Sargento Provolone Mozzarella Cheese:  The Sargento cheese seemed to hold up its form a lot better than the American slice.  When I cut the sandwich in half the cheese did that sexy stretchy thing that we always see in the commercials.  The Provolone Mozzarella blend was quite tasty and I found myself finishing that grilled cheese first. 

The verdict?  I think there is a time and place for all cheeses, I would definitely use Sargento cheese for sandwiches that I would make at home or when friends are over.  I would definitely buy these cheeses again!  But an American cheese grilled cheese sandwich after late night shenanigans or on that random McDonalds cheeseburger- somehow still hits the spot every once in a while.   

PS- the Provolone Mozzarella makes excellent melts!  Check out the buffalo chicken salad melt I made the other day!
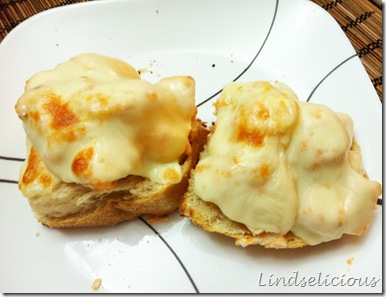
buff

Here is what I made with the rest of the Sargento Cheese that I purchased!  I have been wanting to make these forever.  And now that Fall is on it’s way, pumpkin is back!  Love these spicy savory pumpkin muffins from Baked!
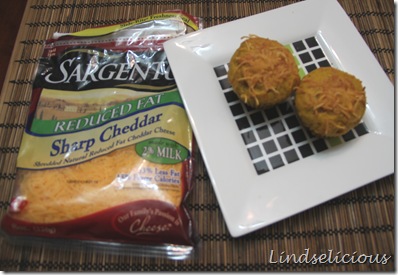
007

Pumpkin Cheddar Muffin
from Baked

1 can pumpkin puree
3 Tbsp. Greek yogurt
2 large eggs
1/2 cup (1 stick) butter, melted and cooled
2 cups flour
1/2 cup firmly packed brown sugar
1 1/2 tsp. baking powder
1/4 tsp. cayenne powder
1 1/2 tsp. salt
1 1/2 tsp. black pepper
4 oz. grated cheddar cheese

1.  Preheat the oven to 400 degrees.  Spray your muffin tin with cooking spray, evenly coating each muffin holder- or if you use a silicon tray they will pop out nicely. 

2.  In a large bowl combine the pumpkin puree, Greek yogurt, eggs and melted butter.  Mix until the ingredients are well combined.
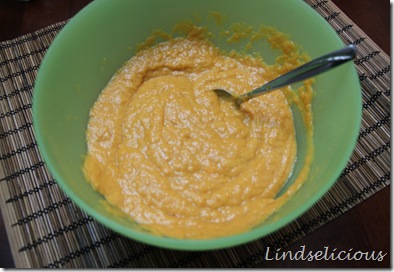
003

3.  In a second bowl whisk together all dry ingredients except for the cheese.  Make a well in the middle of the dry ingredients and slowly add in the wet mix, stirring the batter until evenly mixed.  Fold in 3/4 of the cheese.

4.  Divide the batter among the muffin cups.  Sprinkle each muffin with remaining cheddar cheese.  Bake for 20 minutes or until the muffins are a golden brown. 
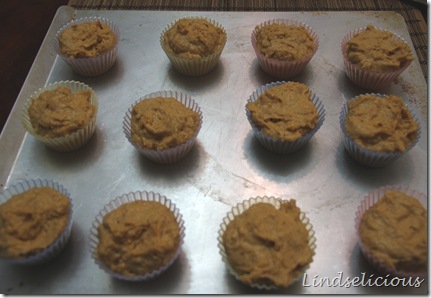
004

Let the muffins cool for 10 minutes and serve warm. 
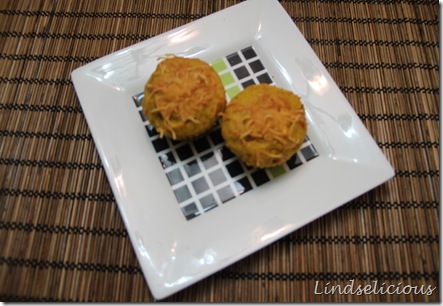
010

I love these muffins, they have a little spicy kick to them and it was such a nice flavor combo.  Who knew that pumpkin and cheese went so well together!  Your left overs (if there are any) heat up super nicely in the toaster oven as well!   

Disclaimer:  I received a $25 dollar gift certificate in the mail to purchase Sargento cheese, a processed cheese and any other accompanying ingredients.  The opinions in this post are my own and I am not receiving any other compensation from Sargento.

Friday, September 9, 2011

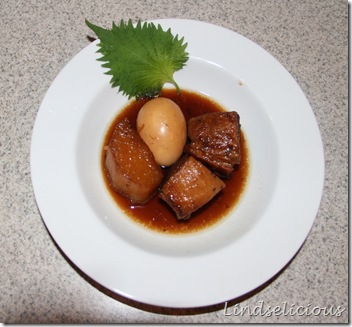
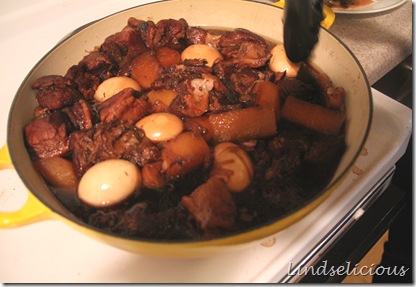
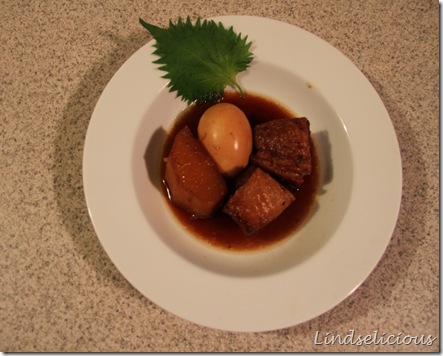
Buta no Kakuni, Japanese Braised Pork Belly

You know how you know that you are getting older?  When the only time you “drop it like it’s hot” is when you are doing jump squats when working out.  And the only “grinding” that you are doing is coffee beans in the morning.  Ok maybe those are extreme examples, but recently a couple of my friends and I started our Sunday Cooking club as a way for us to hang out (goodbye clubbing and bar hopping days?)  Each month we are going to pick a theme and each person is going to bring a dish/ingredients in.  Our first theme as Asian Cuisine! 

In recent years pork belly has appeared in almost every restaurant, but long before it became the appetizer du jour, it has been a staple in Asian cuisine.  This is one of the Japanese classic recipes that I made recently when my friends and I all got together.  My friend MC taught us all how to make Buta no Kakuni!   While this dish takes a while to make, it is definitely worth the wait.   The pork falls apart in your mouth and it sooo good!  Oh and she just started her own blog too!  It’s Slow Carb focused, check it out here!

103

Buta no Kakuni
from MC

1 lb pork belly (choose a piece with the skin still on if possible)
2 Tbsp sugar
1 large Tokyo green onion, cut into 6 inch pieces
1 large piece ginger
3 Tbsp soy sauce
2 Tbsp cooking sake
2 cups water
4 medium boiled eggs *optional
daikon *optional

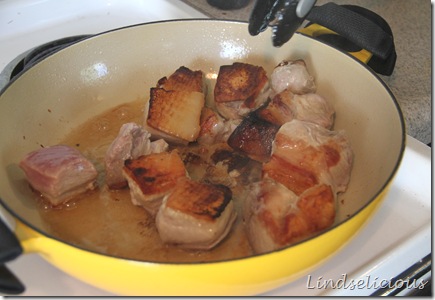
1,  Cut the pork into large cubes.  Turn the burner on medium-high and using a heavy bottom pot to brown the pork.  Brown the pork on all sides.  *No need to put oil in the pan, start with the fat side down.*

060

2.  Once pork is browned, push the pork to the outer edges of the pan and add sugar to the fat in the middle of the pan and stir until caramelized. Coat pork with this substance.

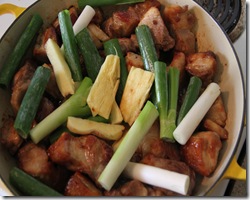
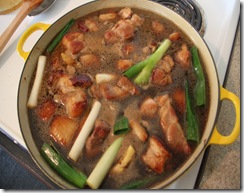
3.  Add all other ingredients to the pan and bring to a boil, then lower heat and let simmer.  Cover and let cook for 3 hours. 

064067
Optional:  During the last hour you can add large peeled pieces of daikon to the pan.  And a couple minutes before serving you can add the medium boiled eggs to the pan, allowing the eggs to soak up some sauce. *Careful not to let it soak too long or the egg will cook all the way through.*

100

So yummy this just melted in our mouths!  I need to make this again soon!!  The Korean Sushi was also a part of our feast that Sunday and I have one more dish that I will share with you as well!  Up for next time is a Crab Boil! 

104

Tuesday, September 6, 2011

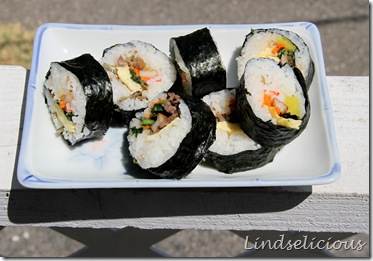
Korean Sushi, Kimbap

I never had Korean sushi till I came up to Los Angeles and visited my first Korean Market.  I spotted it in the prepared food section and got so excited, because I saw that Korean sushi (Kimbap) had marinated beef in it!  Even more exciting, the sushi was also seasoned with some sesame seed oil and salt as well. 

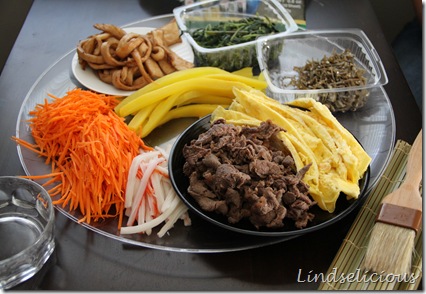
Kimbap quickly became one of my favorite comfort foods.  We picked it up for potlucks, tailgates, road trip, etc.- it is the perfect snack to throw in your bag and take with you on your adventures.  However, this is one of those recipes that its hard to write a recipe for…  Everyone makes it differently and it is definitely one of those recipes that no one ever measures out the ingredients, you just sorta know what is needed.  So think of this as your loose guide, and select your ingredients and season according to your own tastes!

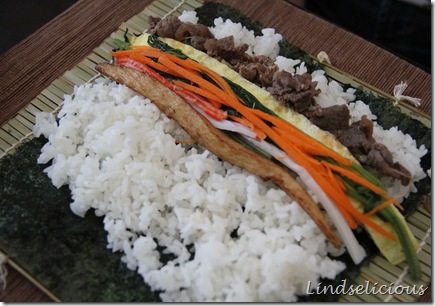
057

Kimbap
recipe from Sage

1 package sushi nori or Korean Nori
1 package takuan, sliced into strips
4 sticks imitation crab
1 container Korean seasoned spinach
1 package of bulgogi (Korean seasoned meat)
1 carrot, shredded
4 eggs, scrambled and cooked as an omelet
2-3 cups rice
fishcake, cut into strips
sesame seed oil
sesame seeds

1.  Cook the rice and prep all of the ingredients.  *Optional: Season the rice with sesame seed oil and sesame seeds* 

048

2.  Layout your nori on top of the sushi mat.  Add a thin layer of rice, leaving room at the end to seal your sushi roll.  Place the variety of ingredients that you would like in your roll. 

050

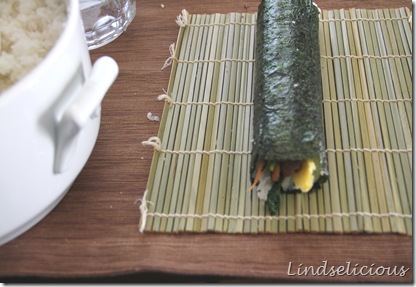
3.  Carefully roll the sushi, pulling back rightly and continue to roll all the ingredients.  Seal the sushi by lightly wetting the exposed piece of nori. 

049

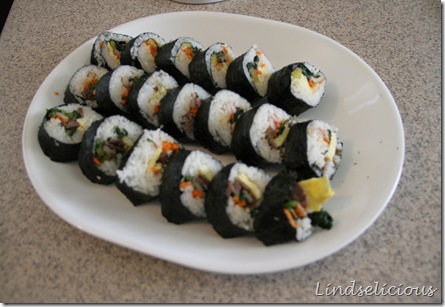
4.  Cut sushi roll with a wet sharp knife. 

054

If you want better instructions on how to roll sushi (it’s just one of those things I grew up doing, so for some reason I can’t describe how to do it), check out these links!  They both have great step by step pictures and instructions on how to make a sushi roll. 

Move over California roll and make room for Kimbap!!  This savory sushi roll is great for those of you who don’t do the raw fish thing too.