Showing posts with label Easy. Show all posts

Sunday, October 30, 2011

Pumpkin Beer Ice Cream Float in my Tervis Tumbler!

It’s been a busy month, October has just flown by literally!  As part of the Foodbuzz Tastemakers program, I received a Tervis tumbler with the Foodbuzz logo on it in the mail a couple of weeks ago.  The tumbler we got is part of their Smartcup line, which I found out has a lifetime warranty, is microwave and dishwasher proof, has a self warming system for hot drinks and has a technology that prevents condensation rings on your table (no coasters needed!!). 

I put this cup to the test by making a Pumpkin Beer Pumpkin Ice Cream float!!  Earlier in the month I had gone out and had seen this on the menu.  I am a huge fan of both Pumpkin Ale and Pumpkin Ice Cream so I knew I had to try this.  While I didn’t order it while I was out on my date, I kept on thinking about making this for the next couple of weeks. 

166

Pumpkin Beer Ice Cream Float
inspired by a bar in Los Angeles

1 bottle Pumpkin Ale
2 scoops Pumpkin Ice Cream

The float totally held up well in my Tervis tumbler!  Unlike a Coke float, the beer float is enjoyed at a slightly slower pace.  The ice cream did not melt but instead turned into a lovely frosty texture and I had no rings on my coffee table when I was done!  I can’t wait to try out the many uses of my tumbler, next I’ll probably put it to the test to see how it holds up to a hot beverage.  

Have a Happy Halloween everyone!

Tuesday, September 13, 2011

Kale Cauliflower Salad

This weekend I went to the farmers market in my hood to pick up some pulots and mini heirloom tomatoes!  I was also there to try and complete my first photography assignment for the class I just started.  The end of summer produce looked great, but I do need more practice changing all my settings.  Here’s a few of my favorite pics!

Green10Purple

Green6Brown5

I’m well into my second month of boot camp and my healthier eating and though the pounds shed are not that high (yet) I can definitely see the results!  The most motivating thing is of course when friends tell you- “you look awesome” or “you lost weight!”.  Once I hear things like that I am even more motivated to eat right!  This is one of those salads that can serve as a meal, with some soup or even a pumpkin cheddar muffin

While my outdoor photos seem to be improving, I still struggle taking my food pictures indoors at night.  Hopefully I’ll figure that out soon….

015


Kale Cauliflower Salad
adapted from Heat Oven to 350

1/2 head of cauliflower, grated
1 cup mini heirloom tomatoes, halved
1 stalk green onion, chopped
2-3 cups of kale
1 garlic clove, minced
2 Tbsp. lemon juice
1/2 tsp sea salt
2 Tbsp olive oil
ground pepper
parmesan cheese, grated

1.  Discard the tough stalk of the kale and finely chop the kale leaves. *I used the pre packaged kale from Trader Joe’s!*

2.  In a bowl combine kale, tomatoes, green onions, and grated cauliflower.  In a small bowl combine lemon juice, olive oil, pepper, sea salt and garlic.  Mix well and toss with kale and cauliflower mix. 

3.  Season the salad with pepper and grate some parmesan cheese over the salad. 

011

This salad was yummy and definitely filling.  I took it into work the next day and the kale held up well, but I think the cauliflower let out a stinky smell.  So that’s a warning if you are self conscious or have co workers with sensitive noses.  I am definitely going to start making this to bring to parties cause I think it holds up really well! 

Thursday, August 11, 2011

Roasted Peaches with Goat Cheese Mousse

This was the super delicious and amazingly quick dessert that I made at my goat cheese dinner party!  As you may remember we started with a simple salad with strawberries, almonds, avocado and goat cheese.  Then we moved on to our main dish, Bacon Goat Cheese Gnocchi.  Since this “dinner party” was planned only a day before, I kept everything super simple.  This dessert was so good and literally only takes minutes of prep allowing you to spend time with your guests. 

016   

Roasted Peaches with Goat Cheese Mousse

3-4 white peaches or white nectarines, quartered
3 Tbsp. light brown sugar
1/2 tsp. cinnamon
1/4 tsp. ginger
4 oz. fresh goat cheese, room temperature
2-3 Tbsp. half and half (or whipping cream)
Honey
Balsamic Fig reduction, optional
Mint, optional

1.  Preheat oven to 400 degrees.  Wash and cut fruit.  Mix brown sugar, cinnamon, and ginger in a bowl.

2.  Dip cut pieces of fruit into the brown sugar mixture and place on cookie sheet or in baking pan. *I lined with foil for super easy clean up!!*

006

3.  Bake for 20 minutes, or until fruit is fork tender and juices start to run out. 

4.  Place soft goat cheese in a bowl and add the half and half to the bowl.  Using a fork, whip the two ingredients until combine.  *Add more half and half if you would like a lighter consistency*

Peaches

5.  Serve warm fruit with a dollop of goat cheese mousse and drizzle with honey.  Garnish with Balsamic Fig reduction and mint!  *Balsamic Fig reduction sauce is possibly the best thing that I bought myself this month!!*  

Seriously, this dessert is soooo good!  If you are grilling, pop those peaches on the grill!  My dinner guest loved it and literally couldn’t believe that it only took me 5 minutes to prep in the kitchen while they were relaxing.  And, if you have any left overs the roasted fruit was super yummy the next morning on my yogurt! 

Wednesday, July 13, 2011

Truffled Egg Salad

The Plaza hotels afternoon tea was a delicious treat that I shared with my mom in New York.  One of my favorites was the luxurious truffle quail egg salad sandwich (pictured below).  I knew I wanted to come home and try to recreate it!  One of my favorite types of foods are simple comfort classics that are elevated with a gourmet twist.   

Plazatea

Truffle Egg Salad Sandwich
inspired by Plaza Hotel

4 eggs
1 Tbsp. truffle oil
1/4 - 1/2 tsp. truffle salt
1 Tbsp. mayonnaise
3 Tbsp. crème fraiche
Chives
Pepper

1.  Boil and peel eggs and place in a bowl.  Coarsely chop/mash the eggs.  *I normally remove some of the egg yolk since I don’t like it too yolky.*

2.  Add in truffle oil, truffle salt, mayo and crème fraiche.  Mix well and add chopped chives and season with pepper. 

023

Serve on toasted bread or crackers.  *My favorite is to serve it on Japanese bread!!  This would also taste amazing with a nice thin piece of crispy prosciutto. *

For those of you in Los Angeles, you have to be living in a hole not to have heard about “carmaggedon”- aka the closing of the 405 freeway for 53 hours.  This is supposed to be an event of epic proportions causing a traffic nightmare impacting all the way to Oregon, Vegas and Mexico.  *That is what KROQ said, so I choose to believe and quote it.*  For those of you looking for something fabulous to do in West LA the Eat Real Fest is happening in Culver City.  There will be DIY demos, food vendors, food crafts and even some celebrity TV chefs!  I will be there on Saturday and hopefully have a recap and some pics that I can post.    

Sunday, July 10, 2011

Roasted Figs and Prosciutto

My friend MC and I had volunteered to make some cake pops for our friend GL’s dessert table at her wedding.  If you have ever made cake pops, you know that this can be a long process.  Baking the cake, waiting for it to cool, making it into balls, chilling them, etc.  I had wanted to make a quick and easy appetizer for us to enjoy while we had some wine and worked on our cake pops!  Good thing we had snacks, since we ran into a few snags and had to work late into the night.  The wedding was fabulous and the dessert table was super cute!  Congrats again to GL and her hubby, gorgeous bride and wonderful wedding!

Gracecakeballs

Desserttable

Anyways back to the snack the helped to power MC and I through the long working session.  I saw these on Pink Parsley and thought I would whip up half of a batch for our “working snack”.  So delish and they even fit into MC’s low carb diet!  

071

Roasted Figs and Prosciutto
adapted from Ina Garten

10  fresh figs
4 oz. prosciutto
1 Tbsp. Olive Oil
1 tsp. honey or agave
Salt
Pepper

1.  Pre heat the oven to 425 degrees.  Wash the figs, trim the stems and cut them in half.  Prepare prosciutto by cutting into strips about an inch thick. 

2.  Wrap figs with prosciutto, overlapping the pieces.  Place seam side down on the cookie sheet.

3.  In a bowl combine olive oil and honey and mix together.  Brush or drizzle the mixture over the figs and season with salt and pepper. 

068

4.  Roast for 10 minutes, until the prosciutto starts to crisp. 

These were so yummy!  I think next time I might toss in some red chili pepper flakes to add some heat.  I’ll probably also make a full batch cause the left overs (if there are any) would be great on a salad as well!  

Tuesday, July 5, 2011

Wasabi Arugula Pesto and the weekend recap

Hope that you all had a great 4th of July!  I had TONS of fun this weekend, starting with the NKOTBSB concert that I went to with my friend SL.  The concert was so fun, growing up I was a huge New Kids (and Nysnc) fan!  Ladies let me tell you, they still got it!  It was so fun to hear some of the old classics remixed and updated as well as a couple mashups of New Kids and Backstreet.  The boys all still look great, Donnie especially- since he ripped off his shirt and he had amazing abs!  I tried to take pictures, but they came out horribly…  

The next day my friends and I went out to the Camarillo outlets for my friends birthday.  This is becoming our traditional birthday celebration since her birthday just so happens to fall on the amazing 4th of July sale weekend!  We spend the WHOLE day shopping and filled the car to the MAX.  What you see below is the result of 9 hours of shopping and 5 determined girls.  Reganomics and trickledown theory at work, just doing my part to stimulate the economy!  

shopping

While I didn’t cook much over this long weekend, I did have some great eats.  One of them was at Bulgarini gelato in Pasadena, CA.  One of the best things about Bulgarini is that one cup allows you 3 flavors of gelato!  I went with almond, chocolate with sea salt and goats milk with cocoa nibs.  It was just the thing to beat the summer heat! The other place the Brazilian and I went to is called Salsa and Beer where they had a yummy bean/salsa concoction and some of the best taquitos, which I will try to duplicate soon! 

You may have seen in Trader Joe’s they now carry something called Wasabi Arugula!  What a perfect matching the spiciness of wasabi and the peppery notes of arugula.  On the bag Trader Joe’s put a nice little recipe for some Wasabi Arugula Pesto sauce. 

photo

Wasabi Arugula Pesto
adapted from Trader Joe’s

1 1/2 cup Wasabi Arugula
1/3 cup olive oil
2 1/2 tsp. salt
1/4 tsp. pepper
1 garlic clove
1 Tbsp. Parmesan cheese

1.  Fill a bowl with ice and water and set aside.  Add 2 1/4 tsp of salt to a sauce pan full of water and bring to a boil.  Add in the arugula and let the water return to a boil.

2.  Remove arugula from the pan to stop cooking process and place in the ice bath.  Squeeze out the excess water from the arugula (use paper towels if necessary) and place in a blender.

3.  In the blender add in olive oil, 1/4 tsp. salt, 1/4 tsp. pepper, garlic and parmesan cheese.  Blend until the mixture is well combined and resembles a pesto paste. 

Serve over pasta, on toasted bread or use as a marinade!  The wasabi heat was very subtle in the pesto, I just served it over some left over macaroni that I had lying around.  This is a great way to use up that arugula that’s a little past its prime for salad eating.  I think this pesto would be great as a sauce over fish!  The rest of my pesto will probably go towards a veggie stir fry.

Monday, June 27, 2011

Lomi Lomi Tomato

As you may or may not know, I grew up in Honolulu, Hawaii.  Growing up in paradise I was exposed to beautiful rainbows, amazing ocean views, daily treks to the beach and a wide variety of food.  Hawaii is literally a melting pot of food, cultures and people.  While ads and TV/movies depict Hawaii a certain way (some better than others) for some reason every dish with pineapple is associated with Hawaii!  I have breaking news- no one in Hawaii eats pineapple on pizza, on their hamburgers or on most savory dishes.  Yes I would say 95% of the people in Hawaii do not eat pineapple on their pizza or have never had it on a burger. 

I thought I would share with you some real local/Hawaiian foods!  I grew up eating Lomi Lomi Salmon whenever I had Hawaiian food.  My friend Jon was the first person to serve me Lomi Lomi tomato.  “Lomi Lomi” means to massage in Hawaiian, which is the way that this dish was traditionally prepared.  All of the ingredients were mixed or massaged by hand to combine.  This recipe is super easy and comes together so quickly.  If you can get a Maui onion or sweet onion, definitely use it!  Maui onions are great and so much milder with a great flavor.      

035

Lomi Lomi Tomato
16 oz. (1 lb.) grape tomatoes, or 4 large tomatoes
1 bunch green onions, chopped
1 Maui onion (sweet onion), chopped
1 Tbsp. apple cider vinegar
1 tsp. Hawaiian Salt (rock salt)
Tabasco

1.  Cut up tomatoes into bite size pieces.  Add in green onions, Maui onion, apple cider vinegar, Hawaiian Salt and Tabasco and mix well.

2.  Chill thoroughly and serve.

053

Serve with Kalua Pig or your favorite Hawaiian dish!  One of my favorites is to eat this with Poi!  Poi is a Hawaiian side dish which is steamed taro that is ground into a paste like texture.  It sounds weird, looks gross, but you either love or hate poi,  Try it with lomi lomi tomato and you will fall in love! 

Wednesday, June 22, 2011

Pork Chops with Mustard Pretzel Crumbs

I love this recipe.  It’s as simple as that.  Pork is one of my favorite meats, but I feel like it is often over looked for chicken or beef.  As “the other white meat” pork cuts can be lean and delicious and is more affordable than people may think.  This recipe is great since it combines two of my favorite ingredients, pretzels and mustard! 

I had picked up a gourmet Chipotle Honey mustard a while back and had spotted these Sea Salt and Pepper pretzels the other day.  Those pretzels by the way are addicting!  If you recreate with this flavor, definitely do not open the bag before you set aside your pretzels for the pork chop!  These pork chops come together in less than 30 minutes and are so moist and flavorful.    

138

Pork Chops with Mustard Pretzel Crumbs
adapted Epicurious

Serves 2

2 Tbsp. Olive Oil
2/3 cup Snyder's Sea Salt and Cracked Pepper Pretzels Pieces
1 clove garlic, minced
1/4 tsp. Italian Seasoning
Salt
Pepper
2 Tbsp. Dijon or Honey Mustard
2 Pork Chops, 1 inch thick (1 lb. total)

131

1.  Pre heat oven to 425 degrees.  Place the Salt and Pepper Pretzel Pieces into the blend and pulse a couple times until the pretzels turn into a crumb like topping.  *If you do not use the Sea Salt Pretzel flavor, you may need to season additionally with more salt.*

134

2.  In a preheated pan, add 1 Tbsp. olive oil, garlic, pretzel crumbs, garlic, Italian Seasonings and salt and pepper.  Brown crumbs and combine mixture for a couple minutes until crumbs turn a golden brown. 

135

3.  Remove crumbs into a bowl and clean pan.  Add remaining olive oil to the pan and brown pork chop for 4 minutes on each side. 

136

4.  Place pork chop in baking dish and spread mustard over each pork chop and cover with pretzel crumbs.  Place into the oven and bake for 5 to 7 minutes.  *Watch carefully or your pretzel crumbs may burn!*

142

Serve with additional mustard for dipping if you like.  I had it with some Israeli Couscous sautéed with spinach and tomatoes.  But it would be great with some mashed potatoes or creamy polenta.  I hope you guys like it, this recipe is being added into my regular rotation for sure!

Friday, May 27, 2011

Herby No Knead Bread

I have a love hate relationship with bread.  I love it fresh out of the oven, with a pat of melted butter on it.  Is anything better?  Now that I am no longer 16, bread goes straight to my belly and thighs.  I had been wanting to make this No Knead Bread for months!  You know the recipe that went around the web 3 times and came back again.  I didn’t want to get too crazy, since I have been known to bomb on yeast recipes.  So I simply cut up some fresh herbs and tossed into this famous No Knead Bread recipe.  Can I tell you that the scent of it baking in the oven was almost more than I could bear.  The bread was perfect.  The crust was nice and crunch and the middle was soft, dense and chewy all at the same time.  I won’t bother reposting since you can find it in the NY Times and on hundreds of blogs.  I found the extra directions and cute pics at Steamy Kitchen to be super helpful! 

381

Success!  Can I tell you that the most exciting sound is to take this bread out of the oven and hear it crackling.  Sorry if you’ve seen this dozens of times, but I was super excited and had to document it!  =)   

NokneadNoknead2

With my many mishaps with yeast, I’ve learned that bubbles are a good thing.  I also learned the hard way you can kill yeast with too hot water! 

Noknead3noknead4

After 12 hours this was the transformation, I was so happy to see it looking that way in the morning.  Nothing is worse than seeing an un-risen blob….

noknead5noknead7

Yipee!  It looks perfect.  I can’t wait to try this with other add ins, wheat flour, maybe some oats or honey as well.  I knew I was going to bake this up so I had bought an amazing container of roasted red bell pepper shallot goat cheese to spread on it.  So if you are afraid of yeast or making bread, take comfort in knowing that even I could do it- so you can too!  (Trust me it’s worth it!) 

382

Sunday, May 22, 2011

Truffle White Bean Dip

The other day my friend A asked me if I had tried the Truffle White Bean dip from Whole Foods yet.  She had me at the word truffle, my interest was peaked, especially since I love any kind of dip or hummus.  A told me it was delish, especially when paired with pretzel chips.  For a few days the description of the dip stayed in my mind, so I decided rather than go from Whole Foods to Whole Foods in hope of finding it, I would make my own!  It was the best decision I made that week, it could be yours too.  This dip is so simple and tasty you will fall in love with it.  Thanks A for your great find.   

These pics are the first that I’ve taken with my new DSLR.  Please bare with me as I stumble around and figure out how to use all the functions it offers.  Any tips and tricks people want to share are also appreciated!   

WhiteBeanDip2

Truffle White Bean Dip
inspired by Whole Foods

1 can Cannellini beans
1 lemon
1.5 Tbsp. Truffle oil
1 tsp. truffle salt
4 cloves of garlic
1/4 cup plain yogurt
1/4 cup shredded parmesan
pepper

1.  Take four cloves of garlic, with skin on, drizzle with olive oil and bake at 425 degrees for 15 minutes.  *You can roast a whole bulb, cause who doesn’t love roasted garlic.  I just did the 4 cloves in my toaster oven.*

Whitebean3

2.  Rinse the cannellini beans and place in food processor or blender.  Add the zest and juice of one lemon, truffle oil, truffle salt, roasted garlic and parmesan cheese.  Blend the mixture until all ingredients are finely combined. 

WhiteBeanDip

3.  Season with pepper (or any other fresh herbs that you like) and mix in the yogurt. *I added some fresh sage on top and it was so good!!  I’m sure basil, rosemary and any other fragrant herb would be great as well.* 

Servings: 6, Calories: 145, Total Fat 5.2g, Carbs: 19g, Protein: 7.8, Fiber: 4.3g. 

Whitebeandip3

Serve with veggies, pita crackers, pretzel chips or any kind of dipper you like.  It was also amazing in a sandwich wrap that I had during the week.  I subbed the mayo for this flavorful dip! 

Sunday, May 15, 2011

Crockpot Chicken Adobo

Hope you all had a great weekend!  This weekend was jam packed for me as I had two friends who graduated from USC with MBA’s and doctorate degrees and two celebrations!  Congrats again to SL and Momo- great job ladies, so proud of you both!  This weekend the Brazilian and I also attempted to play a game of laser tag after our sushi dinner.  We spotted it across the street as we were walking back to the car and decided to go check it out!  Unfortunately just as we put on our vest and the doors to the laser labyrinth opened, we found out that our lasers weren’t working.  It took them a while to figure things out so the Brazilian and I had to leave before we got to play a game. 

Because…. we had bought tickets to see one of the funniest movies we’ve seen in the longest time!  Bridesmaids!  If you have not seen this movie, you need to see it ASAP.  The Brazilian was a little hesitant to go see this, afraid that it was going to be a “Chick Flick”, but it was hardly that.  Maya Rudolph and Kristen Wig are hil-ar-ious!  The whole cast is actually great- go see it, you won’t be sorry!   

bridesmaids-movie-cast

Anyways, on to the cooking!  It seems like everyone around the web is making Chicken Adobo.  Growing up in Hawaii, this Filipino dish would often make appearances at various potlucks.  Even up here in Los Angeles, almost every Hula potluck has a savory vinegary dish of Adobo.  While I enjoy this dish, I have never tried making it myself.  But when I saw Stephanie from 52 Kitchen Adventures version in the crockpot, I knew I had to try it.   

I also thought it would be the perfect recipe to finally use some of the ghost pepper salt that I had bought at my last trip to the Spice Station.  Also known as “Naga Jolokia” salt, it is the hottest salt in the WORLD!  The pepper that is used in the salt is known as the King Cobra Chili, if that gives you any indication of how much punch this gives.  

Adobo4

Crockpot Chicken Adobo
adapted from 52 Kitchen Adventures

2 to 3 lbs boneless skinless chicken thighs
1/2 cup soy sauce
1/2 cup apple cider vinegar
2 Tbsp. minced garlic
2 bay leaves
garlic salt
pepper
ghost pepper salt (GPS) /chili pepper, optional

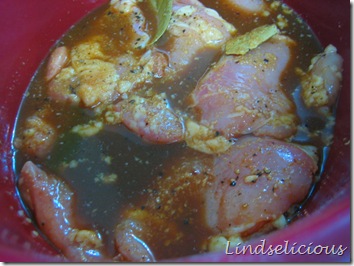
1.  Cut off any excess fat from the chicken thighs.  Season them with garlic salt and pepper and place into the crockpot. 
Adobo

2.  Add in soy sauce, apple cider vinegar, minced garlic, bay leaves and a pinch of ghost pepper salt.  *Careful this salt is spicy, but this dish is a good one to add it to since the long cooking time mellows it out.  I put in about 1/2 tsp.*

3.  Cook on low for 4 to 5 hours or on high for 2.5 to 3 hours or until chicken is cooked through.  *Cooking time will vary depending on power of crockpot.  Chicken with bones still in may also take longer to cook.* 

Adobo2

Serve with rice.  I decided to take some of the sauce in the crockpot and reduce it on a stove top to thicken up and spoon over your chicken.  This dish was so good and so easy, it is no wonder everyone is making it!  I’m not sure who originally posted, but thanks to Stephanie from 52 Kitchen Adventures for introducing me to her crockpot version!  I think she might be the next slow cooking queen, her weekly slow cooker Monday posts are some of my favorite.  Go over and check out her site if you want more slow cooker goodness!     

Monday, April 25, 2011

Omurice (Ketchup Rice)

At the high school I went to in Hawaii, most people brought home lunch.  I'm not really sure why, in fact I don't think I ever ate a hot lunch from the Cafeteria during my entire stay there.  (Though I did eat a lot of pizza and chicken fingers from the Snack Bar...)  My best friend always had the best lunches.  Her mom had moved to Hawaii from Japan and so every day my best friend and her brother had the best bento lunches!  I always looked over in envy and wanted to switch my turkey sandwich and chips for her lunch.  My best friend must have told her mom, since every once in a while she would pack a bento for me too! 

omurice13
One of my best friends favorites, that I often stole a bite of, was Ketchup rice, or Omurice.  This dish is basically a spin on fried rice and combines it in an omelet.  According to Wikipedia, the traditional Omurice is made with a chicken ketchup rice, but this recipe is the way I remember my best friends mom making it. 
Ketchup Rice
from my best friends mom

2 cups day old rice
1/2 onion, diced
1/2 green bell pepper, diced
1 Tbsp. olive oil
2 Tbsp. ketchup
6 slices Canadian bacon/bacon/ham (approximately 100g)
salt
pepper
Tabasco (optional)
4 eggs
1 tbsp. milk

1.  Dice the onion, green bell pepper and Canadian bacon into even sized pieces. 
Omurice

2.  Heat skillet and pour 1 Tbsp. olive oil into pan.  Cook the Canadian bacon, onion and green bell pepper until onion and bell pepper soften.  Season with salt and pepper. 
Omurice3Omurice4
3.  Add in the 2 Tbsp. of ketchup and mix well.  Pour rice into the skillet and mix well until rice is evenly coated with the ketchup mixture.  *If you like it spicy add in a couple dashes of Tabasco*  

4.  Cook until mixture is evenly heated and remove from heat.  *You can eat the ketchup rice just like this or you can wrap it in an omelet*

Omurice5
Omelet
1.  Crack eggs into a bowl and add in milk.  Quickly beat the eggs with a fork.  *I typically use 1.5 -2 eggs per omelet*

2.  Preheat a small skillet and spray with cooking spray.  Pour egg mixture into hot pan and quickly push eggs around in the pan for 30 seconds.

Omurice6
3.  Run chopsticks around the perimeter of the pan and swirl egg mixture to spread evenly throughout the pan.  Repeat as many times as necessary.  Once egg is 90% set, spoon the ketchup rice down the middle of the omelet. 
Omurice7
4.  Flip one side of the omelet over the ketchup rice and roll the omelet onto the plate.  With a paper towel quickly shape the omelet (tuck edges under so it is nicely rolled around the ketchup rice). 

5.  Drizzle with ketchup or Siracha!
omurice10

Technorati Tags: ,,